Cardboard Home Decor Ideas: Transform Cardboard Into Stunning, Sustainable Style
Have you ever looked at a simple shipping box and wondered, "Could this become something beautiful for my home?" The world of cardboard home decor ideas is exploding, moving far beyond children's playhouses to sophisticated, sustainable design statements. In an era where conscious consumerism meets creative expression, cardboard has emerged as an unlikely hero for stylish, budget-friendly, and eco-conscious interiors. This isn't about temporary crafts; it's about redefining value and aesthetics with a material destined for the recycling bin. This comprehensive guide will unlock the potential of corrugated and paperboard, providing you with actionable projects, design principles, and inspiration to transform humble cardboard into the centerpiece of your home's style.
Why Cardboard? The Unbeatable Benefits of This Design Material
Before diving into specific projects, it's crucial to understand why cardboard has captivated designers, DIY enthusiasts, and sustainable living advocates. Its advantages extend far beyond mere cost savings, touching on environmental responsibility, creative freedom, and personal fulfillment.
Eco-Friendly and Sustainable: A Low-Impact Choice
The most compelling argument for cardboard decor is its environmental pedigree. Cardboard is one of the most recyclable materials on the planet, with a well-established recycling infrastructure in many regions. By choosing to upcycle cardboard for decor, you actively divert waste from landfills. According to the Environmental Protection Agency, cardboard and paper make up the largest percentage of recycled municipal solid waste in the U.S., yet millions of tons still end up in landfills each year. Using cardboard for decor gives it a second, extended life before its final recycling. Furthermore, the production of recycled cardboard consumes significantly less energy and water than manufacturing virgin paper or many synthetic materials. When you create with cardboard, you're making a tangible statement about reducing your carbon footprint and supporting a circular economy.
Incredibly Budget-Friendly: High Style, Low Cost
In a time of economic fluctuation, the appeal of affordable home decor is undeniable. Cardboard is essentially free if sourced from deliveries or collected from local businesses (with permission). Even purchasing new, specialty cardboard or paperboard is a fraction of the cost of solid wood, metal, or plastic furnishings. This democratizes design, allowing renters, students, and budget-conscious homeowners to achieve dramatic, personalized style without financial strain. The low material cost means you can experiment boldly, iterate on designs, and even change your decor seasonally without guilt.
Limitless Creative Potential: Your Imagination is the Only Limit
Cardboard is a sculptor's dream. It can be easily cut with a craft knife, scored for clean folds, layered for strength and texture, and glued or taped into nearly any shape. It accepts paint, stain, fabric, wallpaper, and decoupage with ease. This malleability allows for everything from minimalist geometric art to ornate, baroque-inspired frames. Whether your style is mid-century modern, industrial, bohemian, or Scandinavian, cardboard can be adapted. It's a perfect medium for custom DIY projects where you control every dimension, color, and finish, resulting in truly one-of-a-kind pieces that mass-produced items can't match.
Easy to Work With: No Specialized Tools Required
Unlike woodworking or welding, cardboard crafting requires minimal, accessible tools. A sharp craft knife or utility knife, a metal ruler, a cutting mat, and strong glue (PVA glue, hot glue gun) are the basics. More advanced projects might call for a cardboard scoring tool or a bone folder for crisp folds, but these are inexpensive. This low barrier to entry makes it a fantastic activity for all ages and skill levels, from children's first craft to sophisticated adult design projects.
Getting Started: Essential Tools, Techniques, and Safety
To ensure your cardboard projects are durable, professional-looking, and safe, a few foundational techniques and tool choices are essential. Rushing into a cut without preparation can lead to ragged edges or structural weaknesses.
Core Tool Kit for Cardboard Crafting
Your toolkit doesn't need to be extensive, but quality matters. Start with:
- Cutting Tools: A sharp utility knife with replaceable blades is indispensable for straight cuts. For intricate details, a precision craft knife (like an X-Acto) offers control. Always use a self-healing cutting mat to protect surfaces and keep blades sharp.
- Measuring & Marking: A metal ruler (not plastic, which can be nicked) is crucial for straight cuts with a knife. A pencil and scoring tool or the back of your knife blade for creating fold lines without cutting through.
- Adhesives: A hot glue gun provides fast, strong bonds for structural elements. PVA glue (like Elmer's) is better for paper-covered surfaces as it doesn't soak through as much. For a super-strong, gap-filling bond, consider E6000 or similar craft adhesives, used in well-ventilated areas.
- Finishing Supplies: Sandpaper (fine grit) to smooth rough edges, primer (spray or brush-on) to create an even base for paint, acrylic paints, fabric, Mod Podge, or veneer tape for covering.
Mastering Fundamental Techniques
- Cutting: Always cut away from your body on a stable surface. Multiple light passes with a sharp blade are cleaner and safer than one forceful sawing motion. For curves, use a smaller craft knife and rotate the cardboard.
- Scoring: To create a clean, straight fold, lightly run your scoring tool or knife blade along the intended fold line on the inside of the bend. Apply just enough pressure to dent the surface without breaking through. This prevents the outer layer from cracking when folded.
- Layering: This is the secret to cardboard furniture strength. Glue multiple layers of cardboard together, alternating the grain direction (the fluted part) for maximum stability. A three-layer sandwich can be surprisingly rigid. Use clamps, heavy books, or rubber bands to hold layers tightly while the glue dries.
- Reinforcement: For load-bearing edges or joints, create internal braces. Cut strips of cardboard and glue them into corners or along seams. You can also use wooden dowels or skewers inserted into holes for hidden, strong joints.
Safety First: Always cut on a mat, keep fingers clear of the blade's path, and use sharp blades (dull blades require more force and are more likely to slip). Work in a well-ventilated area when using spray paints or strong adhesives. If creating items for children, ensure all edges are thoroughly sanded smooth and non-toxic materials are used.
Room-by-Room Cardboard Home Decor Ideas
Now for the fun part—transforming your space. These projects are categorized by room and complexity, offering a pathway from simple accents to major statement pieces.
Living Room: Making a Statement
The living room is your home's social heart. Cardboard pieces here should be durable and visually impactful.
H2: Geometric Wall Art and Sculptural Panels
Create a stunning focal wall with modular cardboard wall art. Cut large geometric shapes—triangles, hexagons, circles—from single-wall or double-wall cardboard for sturdiness. Paint them in a cohesive palette (think monochromatic, ombre, or bold contrasting colors) and arrange them in a large, asymmetrical cluster. For a 3D effect, create layered panels by gluing smaller shapes onto larger base shapes with spacers (small glued blocks of cardboard) in between. This adds depth and shadow. Pro Tip: Use a laser cutter (available at many makerspaces) for incredibly precise, intricate patterns if you want a lace-like effect.
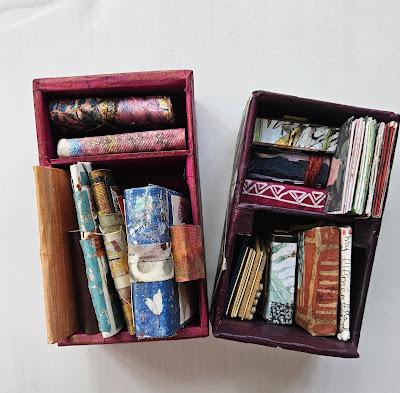
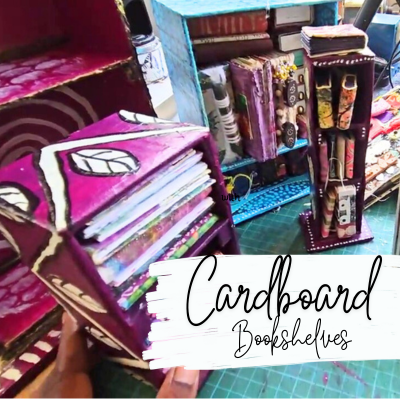
H2: Custom Media Console or Bookcase
Yes, you can build functional furniture! A cardboard media unit is a perfect starter project. Design a simple box with an open front for components and shelves. The key is extensive internal reinforcement. Create a skeleton of interlocking rectangular braces for the sides, top, and bottom. Glue multiple layers (4-5) for the main surfaces. Cover the entire unit with a beautiful veneer—brown kraft paper stained with coffee or tea for a rustic look, fabric for a soft, upholstered feel, or wallpaper for high-glamour. Finish with clear sealant (like a matte Mod Podge) to protect against dust and moisture. For a cardboard bookcase, ensure shelves are adequately supported on all sides and not too wide (max 24 inches unsupported) to prevent sagging.
Bedroom: Serene and Stylish Storage
The bedroom calls for softer aesthetics and clever storage solutions.
H2: Upholstered Headboard
A cardboard headboard is a game-changer for renters. Create a frame from layered cardboard, shaping it into a classic rectangle, a gentle curve, or even a dramatic tufted design. For the tufted look, cut a piece of foam to size, cover it with batting and fabric, then attach it to the cardboard frame using a staple gun. The cardboard provides the rigid backing. Alternatively, create a shiplap-style headboard by cutting long, rectangular planks from cardboard, painting them, and arranging them horizontally with small gaps. The lightweight nature makes it easy to mount with Command Strips.
H2: Jewelry Organizer and Accessory Display
Combine function with art. Cut a large, interesting shape (a sunburst, a tree, a geometric mandala) from thick cardboard. Paint it. Then, attach small cardboard rolls (from wrapping paper or paper towels) vertically or horizontally to hold rings and bracelets. Glue small cardboard boxes or egg carton sections for earring backs. Add hooks (small cup hooks screwed into the cardboard's edge) for necklaces. This creates a personalized, wall-mounted gallery for your accessories.
Home Office & Study: Organized and Inspired
Boost productivity with custom, organized solutions.
H2: Desktop Organizer and Cable Management System
Design a modular desktop organizer with compartments specifically for your pens, notebooks, phone, and desk accessories. Use different heights and widths. Create a cardboard cable organizer by making a simple box with holes drilled or cut in the back for cables to pass through. Paint it to match your desk. For a sleek look, cover the organizer in contact paper or veneer tape. You can also make a monitor stand with a sturdy, multi-layered base and a cutout in the top for cable routing, elevating your screen to ergonomic heights.
H2: Bulletin Board or Pinboard
Instead of a traditional corkboard, create a textural cardboard pinboard. Glue multiple layers of cardboard together to create a thick, sturdy base (at least 1/2 inch thick). Cover it completely with fabric or decorative paper, stretching it tightly and securing it on the back with glue or a staple gun. The thickness allows pins to go deep without poking through the back, and the material is completely customizable in size and color.
Kitchen & Dining: Functional and Festive
H2: Tiered Fruit Stand or Spice Rack
For a cardboard fruit stand, create three or four circular shelves of decreasing diameter. Stack them using sturdy cardboard columns (rolled tubes or solid blocks) as supports between each shelf. Paint the entire piece with a food-safe sealant if it will hold produce directly. For a spice rack, make narrow, deep boxes that fit your spice jar dimensions perfectly. Arrange them in a row on a base or mount them inside a cabinet door. Cover with a wipeable paint or veneer.
H2: Decorative Plate Chargers or Placemats
Create stunning, disposable-elegant cardboard plate chargers. Cut circles from thick, single-wall cardboard slightly larger than your dinner plates. Decorate them with decoupage (maps, sheet music, book pages), paint patterns, or wrap them in fabric. Seal thoroughly. For placemats, use a heavier paperboard, cut to size, and decorate. They add a unique, thematic touch to a dinner party and can be recycled after use.
Seasonal & Holiday Decor: Effortless Theming
Cardboard is perfect for temporary, thematic decor that doesn't require storage.
H2: Holiday Ornaments and Tree Skirts
Cut stars, bells, or intricate snowflakes from cardboard. Paint, glitter, and add ribbon for hanging. For a cardboard tree skirt, create a large, flat circle or a multi-layered, scalloped design. Cover it with festive fabric or paper and add a central hole for the tree trunk. It's lightweight and easy to store flat.
H2: Themed Centerpieces and Table Scapes
Build a cardboard village for Christmas, a ** haunted house** for Halloween, or a patriotic arch for the 4th of July. Use cardboard to create the base structure, then paint and detail with markers, construction paper, and miniatures. For a simple centerpiece, cut a large letter (the family's initial) or number (the year) from cardboard, cover it in festive paper, and stack it with candles or ornaments.
Advanced Projects: Pushing the Boundaries of Cardboard
For the seasoned crafter, these projects demonstrate cardboard's structural potential.
H2: Cardboard "Wood" Furniture: Tables and Chairs
Building a cardboard chair or small table requires engineering. Start with a prototype from scrap. The strongest design is a triangulated structure. Use interlocking triangles for the legs and supports. All load-bearing members must be multiple layers thick (often 6-8 layers glued and clamped). The seat and tabletop should be a single, thick, laminated slab. Cover the entire finished structure with 2-3 layers of fabric or paper using PVA glue to create a hard, shell-like skin that resists wear and moisture. This is a serious project but yields an incredibly light, strong, and conversation-starting piece.
H2: Lighting Fixtures and Lampshades
Cardboard can be transformed into beautiful, diffused lighting. For a cardboard lampshade, create a cylindrical or geometric form from scored and folded cardboard strips. The key is to leave gaps or cut patterns to allow light to filter through. Cover the interior with white paper to maximize light reflection. For a pendant light, ensure the form is large enough that the bulb socket and heat from the bulb (use LED, which runs cooler) do not contact the cardboard directly. Always consult an electrician for any hardwired fixtures.
Addressing Common Questions and Concerns
Q: Is cardboard furniture actually durable?
A: Yes, when built correctly. Durability comes from layering, intelligent design (using triangles and arches for strength), and proper finishing. A well-built cardboard chair can easily hold an average adult. It is not, however, suitable for outdoor use or high-moisture environments like a bathroom without extensive, ongoing sealing.
Q: How do I make cardboard waterproof or moisture-resistant?
A: You cannot make cardboard waterproof, but you can make it water-resistant. The most effective method is to encase it completely. Cover all surfaces—front, back, edges, and any raw cuts—with a sealed finish. Options include multiple coats of spray polyurethane, marine varnish, several layers of Mod Podge Outdoor formula, or laminate sheets. For indoor pieces, a few coats of acrylic sealer spray can guard against minor spills. Always test on a scrap piece first.
Q: What's the best way to paint cardboard?
A: Preparation is key. First, seal the surface with a coat of white glue diluted with a little water (1:1 ratio) or a spray primer. This prevents the cardboard's fibrous surface from soaking up paint unevenly and becoming warped. Then, use acrylic paint (water-based, easy cleanup) or chalk paint (adheres well, minimal prep). Apply in thin, even coats. Spray paint can work but must be used in light, sweeping passes to avoid saturating and warping the cardboard. Always seal the final paint job with a clear, matte or satin sealant to protect it.
Q: Where can I get free, clean cardboard?
A: Your own deliveries are the best source. Ask local grocery stores, furniture stores, or appliance stores for their discarded boxes. They often break them down early in the morning. Be polite, call ahead, and take what they offer. Always inspect for stains, grease, or strong odors (like fish markets) which are best avoided. Clean, dry, single-wall corrugated cardboard is ideal.
Conclusion: Your Sustainable Style Journey Starts with a Box
The world of cardboard home decor ideas is a testament to the power of creative vision and sustainable action. It proves that style and conscience are not opposing forces but can beautifully align. From a simple geometric wall hanging to a reinforced media console, every project you complete reduces waste, saves money, and injects your home with a unique, personal narrative that store-bought items simply cannot replicate.
Don't be intimidated by the structural possibilities. Start small—a painted picture frame, a set of decorative boxes. Master the core techniques of cutting, scoring, and layering. As your confidence grows, so will the scale and sophistication of your creations. Embrace the process, the slight imperfections, and the profound satisfaction of turning "trash" into treasure.
Your home is a reflection of your values. By choosing to furnish and decorate with materials like cardboard, you make a quiet but powerful statement: that beauty can be resourceful, that creativity is accessible to all, and that the most stylish homes are often those built with intention, ingenuity, and a little bit of recycled magic. So, save that next shipping box. Your next stunning piece of home decor is already in your hands.